Thursday, September 28, 2017

Thinking of You


I started to make some Arianna Bloom flowers and I had no idea
where I was going with a project other than I wanted to make these flowers! lol!
Going through my dies I found an old favourite I haven't used in ages!
Of course I had to go with pink paper and voila this is where I ended up!

Lol do you ever start crafting and have no idea what your making!
It's fun!!!

Have a great day! 


Wednesday, September 27, 2017

Sunflowers


I've been having fun making cards with the Shadowbox cards!
What a great way to add dimension to a project!

I thought this one would make an fabulous Thanksgiving card and used the 
Beary Fun Retreat collection along with the Classic Sunflowers from Heartfelt Creations.
They really do take no time at all to make, I know I will be making a few more! 

Have a fabulous day and lots of crafty fun!


Sunday, September 24, 2017

Handbag card/gift box tutorial


Here is a another project and tutorial with the new shadow boxes!
I had fun making this!


As promised during my live on HeartfeltCreations Facebook page (You can watch the video replay HERE) here is a step by step project to make this fun card/gift box!


Step 1: Cut piece of card 11 2/16" x 5" and score at 5" and 6 2/16".
This will form the outer of the handbag.


Step 2: Cut 2 x 5" x 5" pieces of paper and a 5" x 1" strip and 
adhere to the front of the handbag.


Step 3: Take a square shadow box and adhere a 5 x 5" piece of paper
in the centre of it. Adhere the box together leaving one
side open as this will be used to place a gift inside.

Cut a 4 1/2" x 4 1/2" piece of acetate and adhere over the box top.

Cut two 12" x 1/2" strips of paper and adhere around the box sides overlapping the
papers at the corners to get a smooth covering. Trim to fit.


Step 3: (I had to use a Kraft shadow box for the pic as I forgot to 
take it as I was making the project!) Cut a 5" x 5" piece of paper to go over the 
top of the shadowbox. 

Lay it over the back of the shadowbox in place where it would go.


Step 4: Turn the shadowbox and paper over and draw around the aperture in pencil.


Step 5: Lay the Cut Mat Create 2B die over the drawn lines,
tape down and die cut and adhere to the shadowbox.


Step 6: Cut another 5" x 5" piece of paper for the inner of the second
shadow box. This will be the card side of the box.

Adhere the box together and cover the sides and top as previously
described above. Decorate the inner with flowers and a sentiment.


Step 7: Cut a 5" x 1" strip of paper and adhere to the centre of the inner
of the outer. Adhere the card shadow box to the outer also.


Step 8: Cut a tag from the paper pad and score at 1/2! along the base
and adhere to the inside of the outer of the handbag.
Step 9: Adhere the other shadowbox over this section and the inside is complete.


Step 10: Cut 2 pieces of paper for each handle. ( 4 in total)
Place the colour you want on the outer sides so in this case the green is on the top
and on the bottom. This way you get a perfect cut handle!

Lay the large decorative edged oval die on the paper and the largest small
oval die inside, tape down and die cut. 

Do this for both handles.


Step 10: Adhere the pieces together and trip the base of the oval away
to form handles.


Step 11: Adhere the handles to the bag and fasten the tag in place to
close the bag and hold everything together using a velcro dot.

Step 12: Decorate the front and back of the bag.

I used the Classic Sunflower on the front.

On the back I made a pocket and add some jouranling pieces
from the paper pad.

Have lots of crafty fun! 

I used the following to make this project:

Saturday, September 23, 2017

Shadow Box Photo Frame Tutorial


I've been playing with the new shadow boxes from Heartfelt Creations!


I wanted to use them in an alternative way other than that on a card.


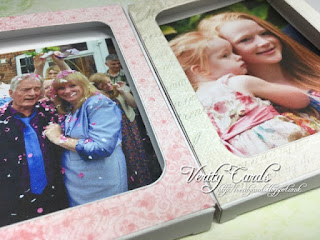
Here is my first idea I had a photo frame! 
Here is a tutorial for you so you can make one too! 


Step 1: Cut a piece of white card 14 2/16" x 3 1/4" and score at 3 1/4", 6 1/2", 7", 7 1/2", 10 14/16"


Step 2: Fold along the score lines so the piece of card looks like the above picture.


Step 3: Cut a piece of paper to go over the front of the Shadow box 3/14" x 4 7/16".
Place over the back of the box in the score lines where it will sit on the front of the box.


Step 4: Turn everything over without moving the paper and draw in pencil around the aperture.#


Step 5: Using the Cut Mat Create Die die cut the centre out of the paper. 
Repeat this for all four of the shadow boxes for the photo frame.


Step 6: Adhere over the front of the shadow box and place a picture inside.


Step 7: Using a piece of paper ribbon from the paper pad adhere around the 
side and top of the shadow box.


Step 7: Adhere the first shadow box to the long piece of scored card.
Ensure the score line is to the right of the box. 

 TIP: It is easier to adhere to by actually folding the card as you are doing it
 to ensure it has that fold in the right place.


Step 8:  Adhere the second box in place to the card also adhering the side of the mountain
fold to the side of the shadow box.


Step 9: Adhere the next shadow box to the other side of the mountain fold and the card piece.


TIP: Make sure it can fold flat together as you are adhering this 
(this is why the next panel has a little extra width to it or it gets too tight! I made mine 2/16" smaller and it worked but just needed a little extra room to account for the folds!)


Step 10: Adhere the last panel and the basic frame is finished!
It can all close up together too at this point! Once you add 3D flowers
this does become harder to achieve tho........

Step 11: Decorate your frame as you choose!
I just added flowers and leaves but as I used my wedding photos I could have used images from the Classic Wedding collection to decorate each panel!

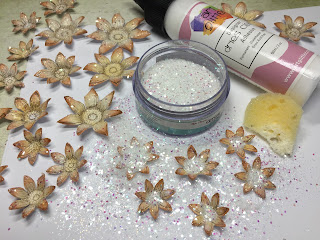
I used the flowers and leaves from the Window Box Fillers stamp set to decorate my frame and colored them in Berrylicious ink and then glittered them with Crystal Clear powder!

Just have fun! These would make fabulous gifts and home decor!
Make sure you share your projects with us on the Heartfelt Creations Facebook Page HERE

I used the following to make this project:

Saturday, September 16, 2017

Just for you.


Thought I'd share a card I made for my Aunts wedding anniversary!
I've been itching to have a go a this style card with the Decorative Medallion die!
It really is EZ to do! I had this made in less than 30mins! Shh.... don't tell her lol!
I have a box of flowers already made that I used. 
I love having a stash of flowers on hand!


There is a real mix of collections here! 
But don't they go well together?
That's what I love about Heartfelt Creations!


I love how blue and pink work together so well!
Good job as I love these colours to work with!

Have a fabulous day and lots of crafty fun! 

Friday, September 15, 2017

Sunflower Tutorial


I LOVE this time of year! I get to make lots and lots of sunflowers!
I use them for some Thanksgiving cards I have to send to the USA and I 
have a few birthday cards in autumn too!

Here is a quick & EZ tutorial for you to make them too!
Have fun!


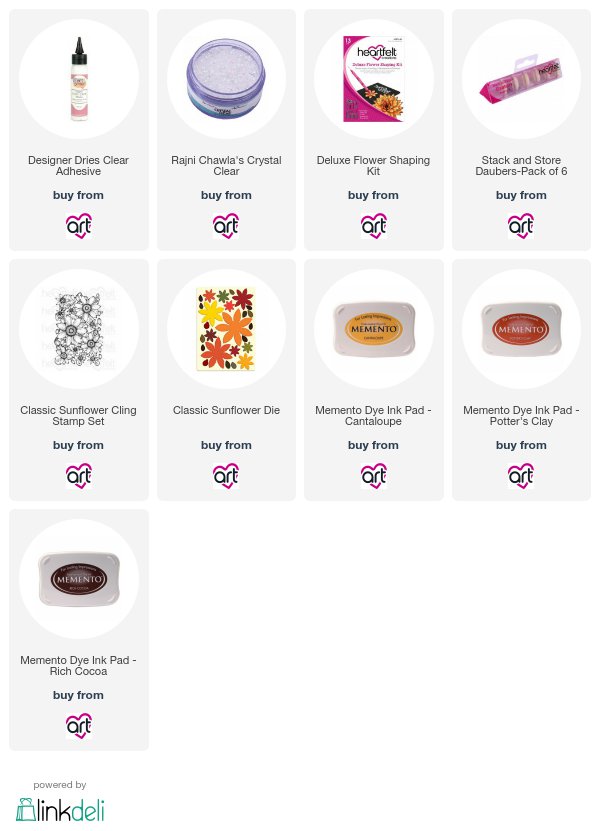
Stamp the Classic Sunflower in brown ink on white card and shade with Cantaloupe ink.


Die cut the flowers with the Classic Sunflower die and shade the petal tips with
Memento Potters Clay ink.


Using the flower shaping tools spray the backs of the flowers with water and then
shape each petal so that they come inwards.


Turn the flower over and using a circular motion around the line shown in the
picture above shape so that the petal come upwards.


Pinch the tips of the flowers for added shape. Using a sponge
apply glue over the flowers and cover with Crystal Clear Powder.


Add Prills to the flower centres and your flowers are complete!
Have fun making flowers, these sunflowers go perfect with the new
Beary Fun Retreat collection! Perfect for all your autumnal cards! 

To make these flowers I used the following:


Monday, September 11, 2017

Fairy door Card


Just had to share this Fairy Door card I made!
I made it for a family member as they have a cute Fairy garden!
Now if only I had made it so the door opened and you could look inside!
A thought to do tho!!! lol! 

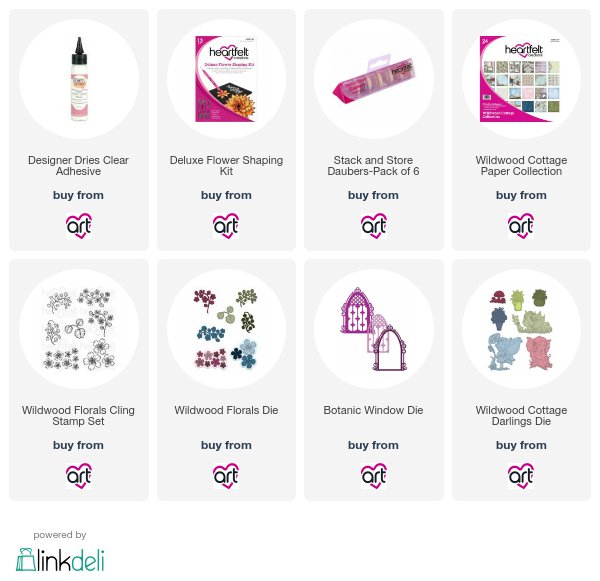
I made it using the Botanic Window die, You can see other
cards made using this and a tutorial HERE

Have a great day and lots of crafty fun! 

I used the following on my card: