Thursday, July 31, 2014

Thinking of you


This was a very quick card to make.
You could almost make it without the 
flowers and leaves as note-lets !

Have you been over to see the inspiration on the 
Heartfelt Creations blog yet ??
Click on the pic below.

Heartfelt Creations

To make the card I used the following:
459222 Paper Blossoms Tools
452255 Grand Calibur
HCD 751 Cut Mat Create die
HCPC 3614 Summer Glory Pre Cut set
HCDP1 245 Cut, Mat, Create paper collection
HCD 746 Sweet Lullaby Die

Other Products Used : White card, glitter glue, Victorian Velvet and peeled
paint distress ink, brown ink, 3D foam pads and pearl gems.

Cut a tent card 4" x 5 1/4" in white card. Cut a card front from the paper
pad and adhere to the card front. Cut out a journalling piece and trim 
slightly to fit inside the card front border. Stamp the sentiment and 
adhere to the card with 3D foam pads. Cut, ink and shape the leaf swirls and the
flowers. Add pearl gems to the flower centres and glitter. Adhere the leaves
and flowers to the card and your project is complete.

Wednesday, July 30, 2014

Gift box Bag


Oohh I have been itching to share this !!
I love this stamp and the papers !!
Yes......... its Wednesday again !!! 
That means Heartfelt Creations projects !!!

Have you checked out the blog?
There is some great projects this week !
Click on the pic below.

Heartfelt Creations

This is the inside of this box/bag


And a close up of the front.
The back which I forgot to photograph ...........
has the same image on too. 
You could cut a blank piece to write on if you wanted .......


Tomorrow I have another project for you.

To make this project I used the following:

459222 Paper Blossoms Tools
452255 Grand Calibur
HCD 749 Cut Mat Create die
HCD 750 Cut Mat Create die
HCD 751 Cut Mat Create die
HCPC 3619 Classic Rose PreCut set
HCD 747 Arianna Lace die
HCD 748 Arianna Blooms die
HCDP1 245 Cut, Mat, Create paper collection

Other Products Used : Pearl gems, glitter glue, 3D glue, All purpose glue,
Ribbon, alchohol pens, white card, peeled paint, tea dye and Victorian Velvet 
distress inks, brown ink,

Cut two pieces of card 5 1/4" x 12 6/16". Score 3" from the bottom on both.
Overlap the 3" pieces and adhere together. Cover the card in paper from the
paper pad on both sides. Cut a handle in the top of each side using the small
rectangle die in HCD 749. Cut a piece of card 8" x 11 1/4" and score 3" on 
all sides. Cut into the corners and adhere together the form a box. Cover both 
the outer and inner sides of the box in contrasting papers and adhere the 
base of the box to the 3" base section. Stamp, colour and cut the image twice and
die cut the mat layer to match in a contrasting colour. Mat and layer and adhere
to the box one on either side. Die cut the leaf swirls and colour. Stamp, cut,
ink and glitter the flowers. Adhere a pearl in their centre. Cut the swirls and
a tag and sentiment from the paper pad. Adhere the tag, sentiment with ribbon to the 
box and adhere the flowers, leafs and swirls and your project is complete.


Monday, July 28, 2014

Celebrate the season.


I thought I would use my Crafter's Companion 
Vintage Xmas Embossing folder and make a card.
This is what I came up with !
I had to use those snowflakes again .......
I used them a lot last year and they have been sat in the drawer
all this time so they needed using again !!!

The Folder is Vintage Holly and wow I have to say
it embosses so beautifully !
and all the layers.
The Holly is Die'sire Holly die . I coloured it with
Peeled Paint distress ink.
The sentiment is one I got from a show years ago on the £1 stall
so I have no idea now of the make sorry ......
The poinsettia is from the BeBunni Xmas CD.
The curve and flag are both Spellbinder dies.

This was so quick to make !
Infact I made it in the time it took my small
daughter to be bathed !

Happy Crafting !


Sunday, July 27, 2014

O' Christmas Tree


Over at the Christmas Card Club Sylvie challenged us to .....
USE A XMAS TREE !

So .... I thought I'd use up another of my LOTV images.
I bought so many of them !!
Oh and yes ladies its those snowflakes again !!!
Well I do have a lot of them that need using so I can buy more !!!
They are actually Xmas decs !
The Holly is from the Die'sire Holly die, Poinsettias I made 
from the BeBunni CD and sentiment is from
Gingerbread Twist CD from Polka Doodles !

I like this fold, its very easy to make!!
Oh and of course I had to add some gems and glitter!
Blingtastic !!! hehe


Thursday, July 24, 2014

Flowers


Here is my second Project this week for Heartfelt Creations.
Have you checked out the inspiration on their blog yet ??
Click on the pic below

Heartfelt Creations

This card was very quick to make thanks the to the 
Cut, Mat Create dies !
I love this concept.
Now whilst I'm not a scrapbooker 
I think I will have a go with this !!

To make the card I used the following:
452255 Grand Calibur
HCD 750 Cut Mat Create die
HCD 749 Cut Mat Create die
HCDP1 245 Cut, Mat, Create paper collection
HCPC 3614 Summer Glory PreCut set

Other Products Used : Ribbon, white card, promarkers, 3D glue

Using folded white card cut a card 4" x 5 1/4". Cut a card front from
the paper pad adhere ribbon over it and adhere to the card. Stamp
the image and colour. Stamp again and colour and cut out the butterfly.
Die cut with the smaller die and adhere the butterfly to the image.
Die cut the larger die using paper from the paper pad. Mat and layer the 
two die cuts and adhere to the card. Tie a bow and adhere to the front.
Glitter the flowers and butterfly wings and your project is complete.

Wednesday, July 23, 2014

My Thoughts are with you


I love Wednesday's! I get to share my
Heartfelt Creations projects with you !!!
(A second one tomorrow)

Make sure you pop over to their blog there are some great
projects over there.
Click on the pic below

Heartfelt Creations

This is a fusion card !!! 
Well the papers are Arianna Blooms, sentiment
Raindrops on Roses and the flowers are Sunkissed Fleurs !!
Just shows how good all the collections work together !

To make the card I used the following:
HCD 736 Classic leaf die
HCPC 3545 Open Leaf PreCut set
459222 Paper Blossoms Tools
452255 Grand Calibur
HCD 734 Sunkissed Fleur Die
HCPC 3533 Sunkissed Fleur PreCut set
HCDP1 244 Arianna Blooms Paper pad
HCPC 3600 All Occasion Sentiments

Other Products Used : Pearl Gems, Glitter glue, White Card, Peeled Paint,
black Memento and Victorian Velvet distress inks, 3D foam pads.

Cut a tent card 5 1/4" x 4" using the white card. Cut a card front from the
paper pad. Cut the centre of another card front and stamp the sentiment
on it. Adhere using 3D foam pads. Stamp, cut, ink and shape the leaves.
Stamp, cut, ink and shape the flowers. Add pearl gems to the centre of
the flowers and glitter the flowers. Adhere the leaves and flowers to your
card and glitter the lines on the card and your project is complete.

Sunday, July 20, 2014

Wedding Card


My friends got spliced last week and this is the card I made them.
I hope they worked out how to stand it up !!! hehe

I love this shaped card, its a Go-Kreate die.
The border and leaves are Martha Stewart punches.
Image is LOTV and paper is from Cuddly Buddly.
Love the effect of the pink and Kraft card.

Well its another busy weekend, the first of the summer holidays !!
I love having the children home and doing things with them.
Happy crafting !!

Saturday, July 19, 2014

Candy Winner !


Thank you everyone for joining in my Candy !!
I have a winner !!

I used Random.Org to draw a number and the winner is ........


NO: 36 Patti Kunkle !!!
Congratulations !!
Please email me your details at passionforsparkle@gmail.com
And I will post straight out to you !

Thank you everyone for joining in, 
Will have candy again soon !!

If the prize isn't claimed by Midnight GMT 25th July 2014
I will draw this again.

Well we are due rain, rain and rain oh and a few thunderstorms
today ........ so keep dry everyone!!!
Happy crafting


Friday, July 18, 2014

Christmas Candy !!!


THIS POST IS A PINNED POST PLEASE
SCROLL DOWN FOR OTHER POSTS !!

Its been so long since I had a give away so I thought
it was time to correct that !! 
So here is a Heartfelt Creations Die Banner and trees !!
It is one of their Christmas dies, well its not that far away shhhh !!! hehe

So the rules ........
Add your name to the Linky below and I will use Random.org to draw a winner !
Please only add your name once, you don't have to be a follower
but it would be nice if you did decide to follow me.
You have until 11.55pm GMT on the 18th July 2014 to enter.
A winner will be announced on my blog. 
If I haven't heard from the winner by midnight on the 25th July 2014
I will draw another name using Random.org

Good Luck everyone !!
I love this die I just got hold of one myself !!

Birthday time


Its my OH birthday and I made him a card.
This is an envelope card, you can see the insert
under the card in the pic above.

I find male cards so hard to make .............. 
I know it has flowers on, but he likes flowers !


This is the back of the card. You could cover it with
another piece if you wanted but I like it left like this !
The folding makes it like this.
I have a tutorial HERE on how to make it


The insert is a piece of paper cut to size and then
another matted and layered on top.
I chose to cut it so the pattern was  on the layer.


Of course I had to get the glitter glue out !!!
So I glittered the edges of the insert and the flowers and butterfly.

Papers, dies and sentiment and leaves are all from Heartfelt Creations.
Flowers are from WOC.

Hope you like it !
Right we are off to Whitby for fish and chips !
Yum !!! 

Happy crafting


Thursday, July 17, 2014

Birthday flowers


Here is my second project this week for Heartfelt Creations.
Have you checked out the inspiration over on their blog?
Click on the pic below

Heartfelt Creations

I'm loving this Cut Mat Create collection !!

To make the card I used the following:
459222 Paper Blossoms Tools
452255 Grand Calibur
HCD 734 Sunkissed Fleur Die
HCPC 3533 Sunkissed Fleur PreCut 
HCPC 3615 Summer Song Precut set
HCD 750 Cut Mat Create die
HCD 751 Cut Mat Create die
HCDP1 245 Cut, Mat, Create paper collection

Other Products Used : Pearl gems, glitter glue, 3d foam pads, lilac ink
white card, alcohol pens, green card, ribbon.

Using the white card make a 8" x 8" card. Cut a piece from the paper pad
7 1/2" x 7 1/2" and adhere to the card. Cut a card front from the paper pad
and adhere ribbon around it. Adhere to the card offset to the right. Die cut
using the paper pad the rectangle from HCD 751 and adhere to the card.
Stamp the image and die cut with HCD 750. Colour and adhere to the card.
Using green card die cut the leaves swirl from HCD 751 and adhere to the card.
Stamp, colour shape the flowers, add the pearl gems and glitter. Adhere the 
flowers to your card. Cut a sentiment ticket from the paper pad and adhere
to the card, your card is now complete.

Wednesday, July 16, 2014

Photo Cube


Ooh its Heartfelt Wednesday at last !!! 
I have been wanting to share this for a few weeks now !!
Remember those plastic photo cubes our
Grandparents had sat on the side with our photos in ???
Well ...... this is my take on one of those !
And these photos are of my Grandparents !
All photos are from 1940 and earlier !!
I love old photos !!!

Pop on over to the Heartfelt Creations and 
check out the inspiration over there !
Click on the pic below

Heartfelt Creations

This is photo heavy as there are so many sides to my project !!
Here is the top.
You could of course have a photo on it !!


To make this cube I have a tutorial HERE
then all you need to do is decorate !!!


This would make a great gift.
I wish my Grandma was here she would have loved this !
She was always very encouraging on anything I made 
and saved everything !!! 
Its interesting looking back at my makes !!


To make this I used the following:
459222 Paper Blossoms Tools
452255 Grand Calibur
HCD 750 Cut Mat Create die
HCD 749 Cut Mat Create die
HCD 751 Cut Mat Create die
HCD 752 Cut Mat Create die
HCD 742 Majestic Blooms die
HCPC 3578 Majestic Morning background.
HCDP1 245 Cut, Mat, Create paper collection

Other Products Used : Beads, Peeled Paint and Victorian Velvet ink,
3D glue, All Purpose glue, Kraft and Brown card, tea dye ink, photos.

I have a tutorial on how to make the cube HERE
Ink all the edges with Tea dye ink.
Using the brown card die cut four of the rectangles using HCD 749. 
Using HCD 750 die cut four photos and adhere to the brown die cuts.
Using the brown card cut a square using HCD 751 and then using 
Kraft card cut the square from HCD 752 and adhere to the brown
die cut. Die cut four leaf swirls from HCD 751 and colour with ink.
Die cut eight leaf swirls from HCD 750 and colour with inks. Stamp,
cut, shape, colour the flowers and add the beads and glitter.
Adhere the photos to the sides of the box and the square to the top
using 3D glue. Adhere the leaves and flowers and your project is complete.


Photo Cube Tutorial


Here is a photographic tutorial on how I made this photo cube.
Much nicer I think than those plastic 70's ones !!! hehe

I made this for my DT work for Heartfelt Creations

Heartfelt Creations

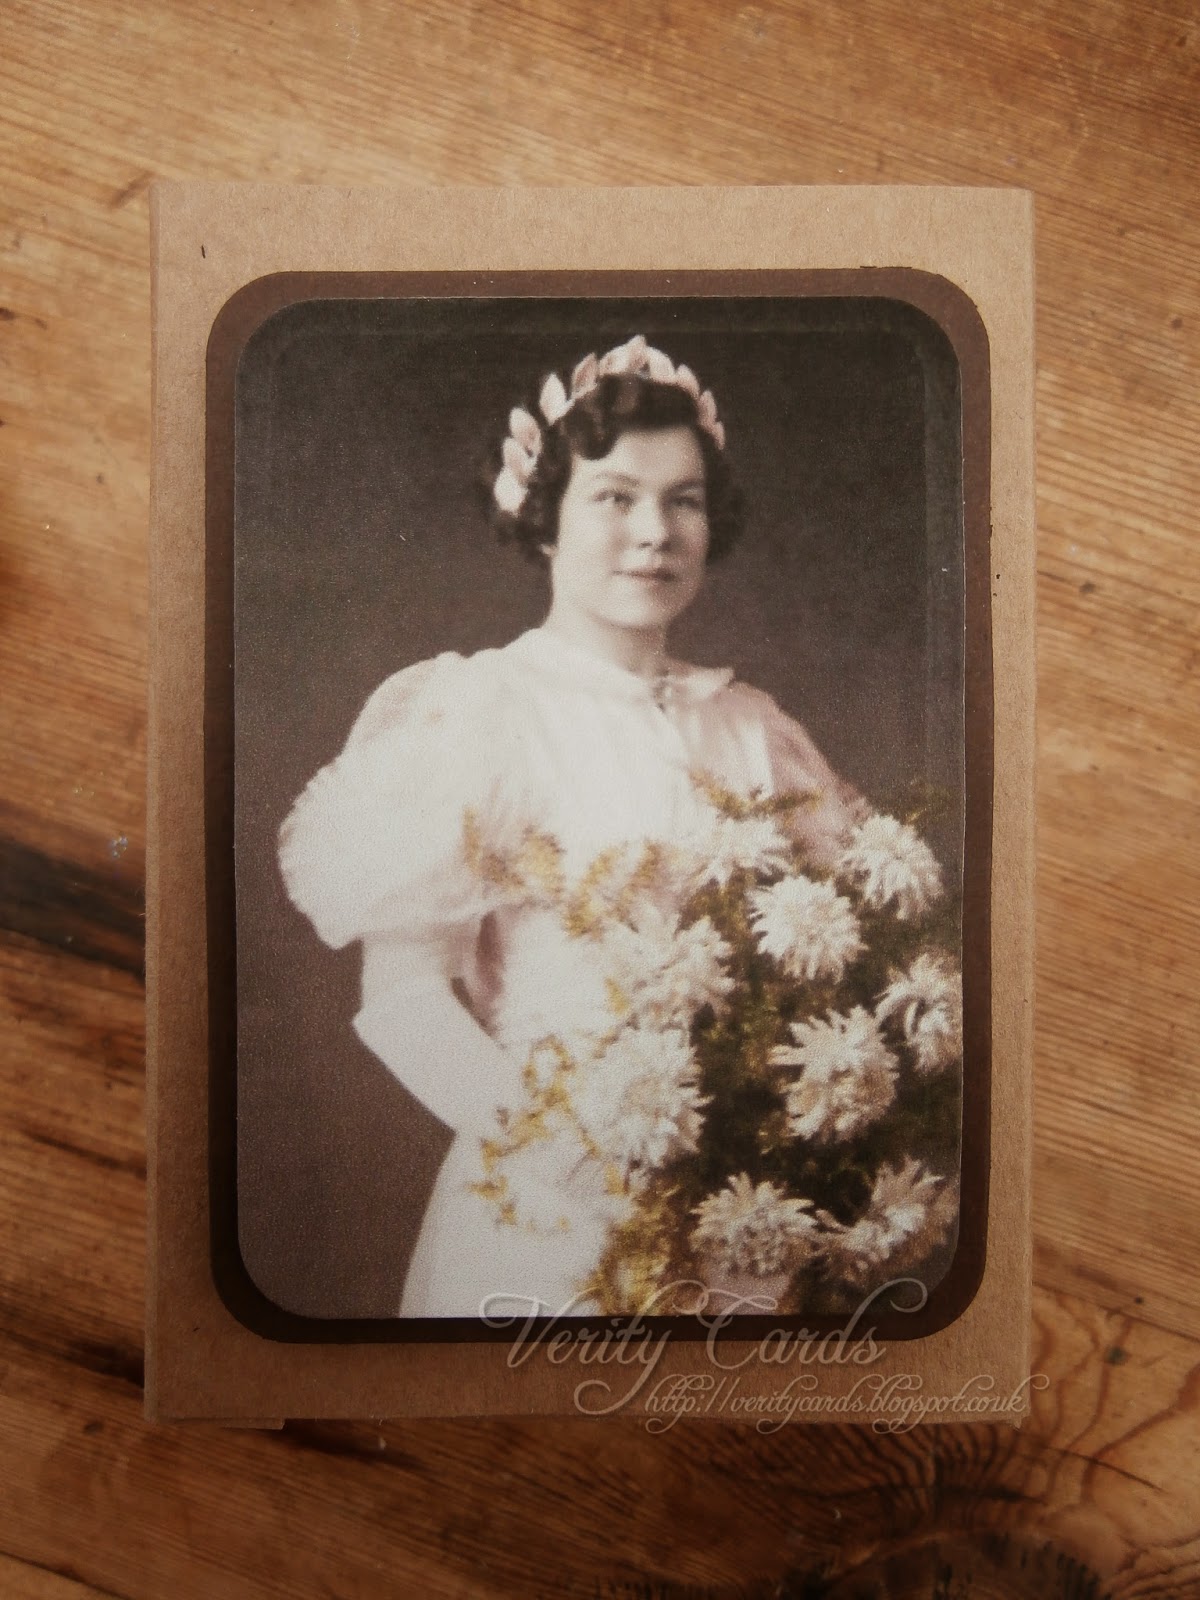
Using the 3 3/4" x 2 3/4" rectangle from HCD 750 dies,
die cut four photographs.
The ones I chose are 1940 and earlier so they are in sepia.
Hence my choice of Kraft card and brown card
so that the photos are set off !


Using the 4" x 3" die from HCD 749 die set,
die cut four pieces of card.


Mat and layer the photos onto the card using 
3D foam pads.


Cut two pieces of card 5 1/2" x 7" to make the sides of the box.
Cut two pieces 5 1/2" x 5 1/2"


Using the square pieces of card,
score 1" around each side of each piece.


Cut a triangle out of each corner to make a flap
which will be glued to the side to make the box base.


Fold the score lines and adhere the corners to make your box base.
Do this to both square pieces of card.


Using the two rectangle pieces of card
score at 3 1/4" and 6 1/2"


Adhere one of the box bases to the side within the score line
of the middle section.


Do the same with the other box base at the other
end of the sides of the cube.


Now glue the small flap to the box base's


Using the other side piece adhere the small flap
to the box bases in the opposite direction to the other.


Adhere the sides down.


Your cube is now formed!


NOW ........... I forgot this bit as I was making it so
you have to imagine I  have inked the edges in the rest of the photos !!
I know ............ but its so easy to do !!!
So........... Ink all the edges using tea dye distress inks!!

Adhere the photos to the sides of the cube using 3D glue.


Using the dies from HCD 752 and 751 die cut
the larger in brown card and the smaller in Kraft.


Adhere together using 3D foam pads.


I love 3D glue, look how it holds its shape.


Adhere the sqaures to the cube with 3D glue.


Now all you need to do is decorate !!!

I used Majestic Morning flowers and the leaf swirls from
HCD 750 and HCD 751.
The leaf swirls I inked using Peeled Paint Distress inks.
For the flowers I used Victorian Velvet distress ink,
and clear glass beads for the centres.


Any questions please ask !!
Happy crafting.